Running the first time
The basis of Pro Align Tools is to define a projection Plane where the objects will perform their alignment. Objects then can align in different ways in relation to that projection Plane, opening a whole set of possibilities to align within 3D space.
The predetermined alignment of Pro Align Tools is just to align all selected objects to their minimum X in Global Coordinates. The default behaviour uses the geometry of objects, whose origin of displacement is picked up from a generated bound box that is perpendicular to the current plane.
This alignment is the equivalent of just clicking the positive X arrow of the leftmost gizmo from your current Selected objects (leftmost gizmo in the X axis as seen from the top view).
So, as a first exercise, just select some randomly placed objects. You should see a preview of the alignment showing you how will the objects move to align at the minimum X of the selected objects’ bound box. If you press Enter/Return, your objects will align.
You can move, rotate and scale the objects all you want while the preview runs in realtime.
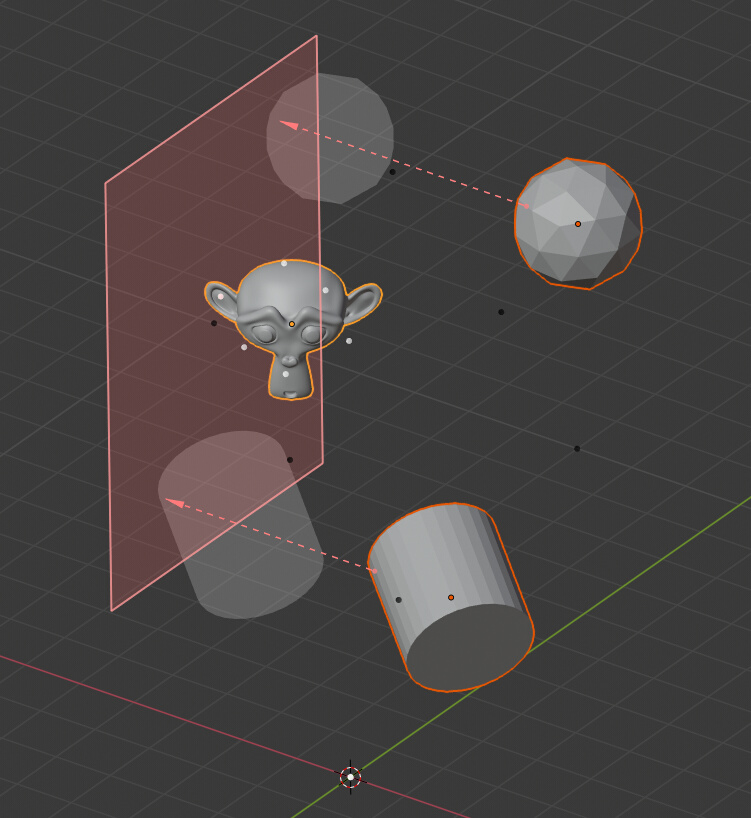
The default behaviour of Pro Align Tools.
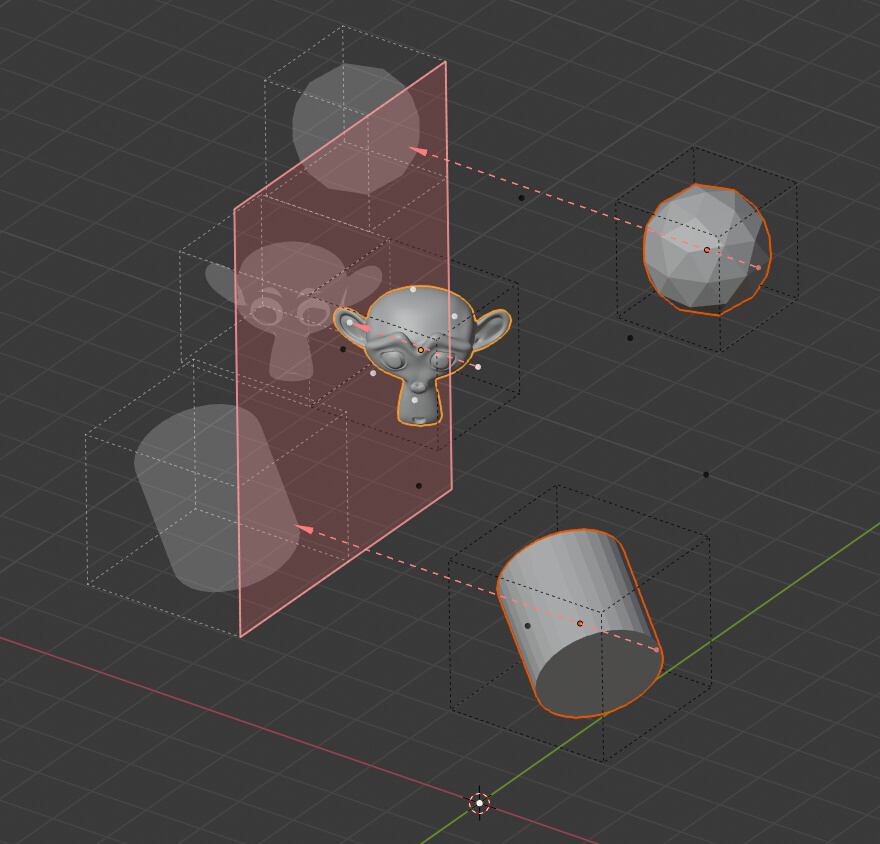
To better see what’s going on, enable the little bounding box button next to the Origin point panel at the Sidebar (N). This allows you to see the considered bound box that is being used while your alignment is taking place.

Enabling the drawing of bounding boxes for objects.
Now you can see that your objects have a bound box from where the origin of the translation is being picked up.

The bound box helps to understand how is the alignment being performed.
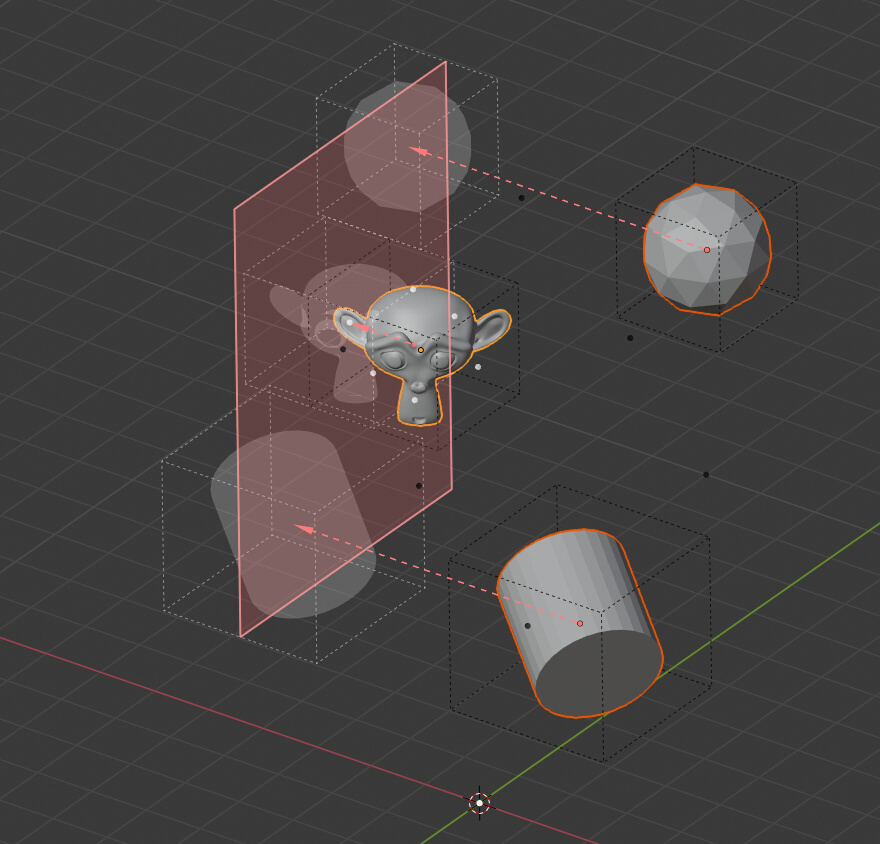
To switch fast between the levels of alignment relative to the plane, use the Alignment depth buttons on top. This is just a predefined configuration of alignment that automatically takes the origin point on your object to make it go to one side or its opposite in relation to the projection Plane.

Align your object to the ‘left’ (negative direction of the current plane)
The alignment has changed.
As you can see, your objects get aligned to the other side of the projection Plane, and the origin points from where the translations were being taken, had moved from one side of the bound box to the other.
Try the centered alignment.

The preset for a centered alignment.
The objects are now centered on the plane.
Now the origin points have moved to the center of the bounding boxes.
Confirm the alignment by pressing the Align Objects button at the top of the Sidebar (N), or by just pressing the Enter/Return key.
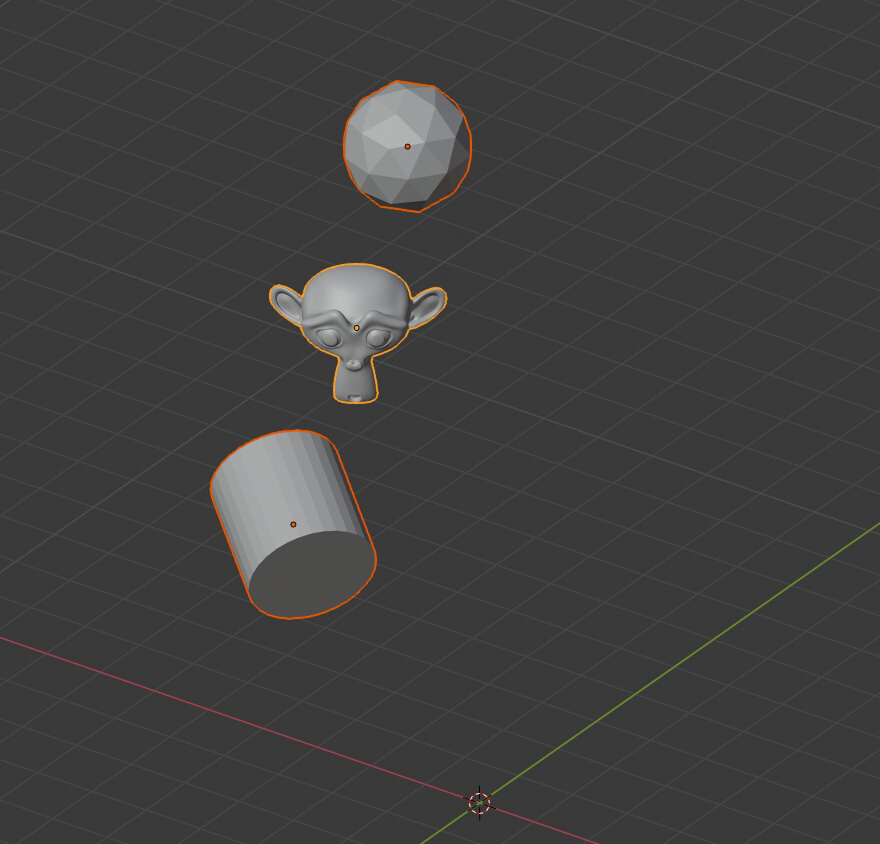
The objects have been aligned to the Plane.
Your objects move to their final position, and the alignment preview is updated, showing a new alignment possible, relative to the selected objects.
When the next alignment allow objects to move, you will see the projection Plane moving to a different position of alignment, otherwise you will only see the projection Plane in the same place and no arrows, as the objects have reached to a static no-move point.
As you may have noticed, your last settings are remembered per session, that means that you can easily apply the same alignment to different selections of objects until you close Blender.