Adding a Custom Orientation
To manually add a Custom orientation to use with Pro Align Tools, you can select the elements from where you want to take an orientation, both in Object or Edit modes and then click the Transform Orientations dropdown menu found in the 3D view, from where you can create a new Custom orientation by clicking the + icon. Optionally, you can call the Create Orientation operator from the operators Search menu with the shortcut F3.
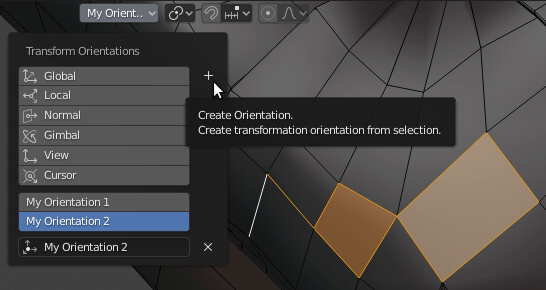
The Transform Orientations dropdown menu in the 3D view.
The operator is sensitive to current selection, so it will take your selected elements and will create an orientation based on that.
Once you have your custom orientation defined, you can make use of it whenever you have one of the custom orientations selected in the Transform Orientations menu. This means that though you may have many orientations defined, you can only make use of one at a time by selecting it in the Transform Orientations menu. Pro Align Tools displays only one entry to use a custom orientation.
You cannot use any of the built-in orientations that come with Blender as a custom orientation. If you select one of these, the Custom orientation in Pro Align Tools will display (None) and behave as if it was just a global orientation.

The current Custom orientation displayed in Pro Align Tools.